
Window feeders bring birds close enough to watch from indoors and are a great option if you do not have yard space for a pole setup. Getting a secure, bird-safe installation just takes the right hardware and a bit of care.
Choose the Right Attachment Style
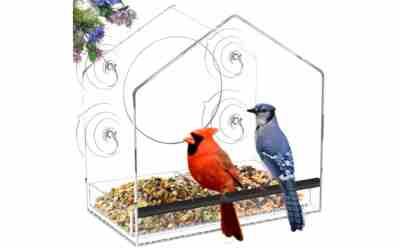
Most window feeders attach with strong suction cups, and quality matters here: look for large, weatherproof suction cups rated for outdoor use rather than the small suction hooks meant for lightweight indoor items, since a feeder full of seed is much heavier once birds are landing on it too.
Clean the Glass Thoroughly First
Wipe the window down with glass cleaner or a vinegar-water solution and let it dry completely. Any dust, grease, or residue will weaken the suction cup’s grip significantly.
Pick a Spot in Direct Sun If Possible
Suction cups hold better on a warm surface, so a window that gets some sun during the day will actually keep the feeder more secure than one in constant shade, where cups can loosen as the glass cools.
Press and Hold Each Cup Firmly
Press each suction cup against the glass and hold for 15 to 30 seconds to force out trapped air, then give the feeder a firm tug test before adding any seed to make sure it is fully seated.
Check the Cups Regularly
Suction cups degrade with UV exposure and temperature swings over time. Check the grip every couple of weeks, and replace cups once they feel stiff, cracked, or start losing their hold, since a feeder falling can hurt birds mid-feed or scatter seed against the house.
Reduce Window Strike Risk
A feeder mounted directly on the glass actually lowers collision risk compared to one a few feet away, since birds approaching a feeder right on the window do not build up enough speed to injure themselves if they misjudge the glass.
Our Top Picks
Ready to shop? These are the top-rated options from our hands-on roundup, Best Window Bird Feeder of 2026.

Nature's Hangout Window Bird Feeder 12x4x5 in Acrylic

Nature Gear Clear Acrylic Window Bird Feeder

Nature's Way Crystal Window Seed Feeder 2-Cup
As an Amazon Associate we earn from qualifying purchases. Product prices and availability are accurate as of the date/time indicated.