
Outdoor lights not working are most often a power or control problem, not a bulb: check the GFCI, breaker, timer and photocell first, then bulbs, connectors, transformer and cable. Work from the two-minute checks to the 30-minute tests below, and stop at any line-voltage wiring, which belongs to a licensed electrician.
Match the symptom to the likely cause
What the lights are doing narrows the search. Find your symptom, then jump to the step listed.
| Symptom | Likely cause | Go to |
|---|---|---|
| All fixtures dark | Outlet, GFCI, timer, photocell or transformer | Steps 1 and 4 |
| One fixture dark | Bulb, socket or its connector | Steps 2 and 3 |
| Dark from one fixture onward | Cable break or loose connector after the last working fixture | Step 3 |
| Dimmer farther from the transformer | Voltage drop in a long or thin cable run | Step 4 |
| Flickering | Loose or corroded connector, or a failing LED | Steps 2 and 3 |
| Run on, then shuts off after a few minutes | Transformer overload protection or a bad connection | Step 4 |
| Solar lights dark at night | Panel, battery, switch or sensor | Solar section |
| GFCI or breaker keeps tripping | Moisture or a wiring fault | Final section |
Step 1: Check the outlet, GFCI, breaker, timer and photocell
These checks need no tools beyond a lamp or phone charger, so do them before touching a fixture.
- Test the outlet. Plug a lamp into the same outdoor outlet. If it is dead, press RESET firmly on that GFCI outlet. A GFCI elsewhere on the circuit, such as in a garage, basement or bathroom, can also be the one that tripped, so reset those too.
- Check the breaker. A tripped breaker often sits halfway between ON and OFF. Push it fully to OFF, then back to ON.
- Check the timer or smart plug. After an outage, mechanical and digital timers can lose their clock, and smart plugs can drop off Wi-Fi. Reset the time, reconnect the plug, or set the timer to manual ON to see whether the lights respond.
- Test the photocell. In daylight, cover the sensor with your hand or opaque tape and wait a minute or two. If the lights come on, the sensor works. A nearby porch light or street lamp shining on the sensor can keep lights off at night, so re-aim or shield it.
- Read the outlet with a multimeter (optional). Set it to AC volts. A healthy US outlet reads about 110 to 120 volts. Test only when everything is dry.
If a GFCI will not reset, or trips again right away, stop and read the final section. Pressing reset over and over is not a fix. Press the TEST button monthly to confirm the GFCI still works; manufacturers commonly suggest replacing GFCI outlets after about 10 years.
Step 2: Test bulbs and sockets
If only some fixtures are dark, swap in a bulb you know works, matching the base, voltage and wattage. Turn the power off first.
- Look at the bulb. A broken filament or blackened glass on a halogen or incandescent bulb means it is finished.
- Inspect the socket. Green or white crust and bent contacts stop current. With power off, brush the contacts clean and straighten them gently.
- Match the wattage. On low-voltage systems, a higher-wattage bulb than the fixture calls for adds load and can trip the transformer.
- Check for water. Moisture inside a lens points to a failed gasket. Dry the fixture fully and replace the gasket or the fixture.
- Integrated LED fixtures have no bulb to swap. Move the fixture to a spot that works. If it stays dark there, the fixture itself has failed.
Bulb type matters outdoors, too. Our explainer on whether outdoor lights need special bulbs covers wet and damp ratings.
Step 3: Inspect connectors and cable
Unplug the transformer, then walk the run from the transformer outward. The break is almost always just past the last fixture that still works, so start at that fixture’s connector and the cable after it.
- Physical damage. Mower blades, string trimmers, spades and aerators are leading causes of cut cable. Chew marks from rodents and cable pinched under a rock, gate or edging also break a run.
- Connectors. Cracked housings, green corrosion and clamps that are not fully pressed down leave the contacts off the wire. Open the connector, clean it, and press it down until it seats, or replace it.
- Repairing a cut. Trim to clean copper and join it with a waterproof splice or connector rated for direct burial, following its instructions. Plain tape will not hold up in soil.
Step 4: Test the transformer and check voltage drop
A transformer powers every fixture on its runs, so a fault here darkens them all. Check these in order with the transformer unplugged, then powered.
- Look for a reset button or internal breaker. Many transformers have one. Fix the cause first, then reset. Common causes of tripping are a short, an overload, a pinched cable or a faulty LED lamp.
- Add up the load. Total the fixture wattage and keep it at or below the wattage on the transformer label.
- Read the output. With the outlet confirmed live, set the multimeter to AC volts (or DC if the label says so) and touch the probes to the output terminals. A reading close to the label rating, commonly 12 volts, means the transformer is fine. No reading with a live outlet points to tripped protection or a dead unit.
- Read the last fixture. Measure at the socket or connector of the farthest fixture. A much lower number than at the transformer is voltage drop.
- Find a bad run. With the transformer on, clamp an amp meter around one conductor of each run. A run drawing far more than its fixtures should (watts divided by volts) likely has a short.
What voltage drop looks like: a worked example
These are typical values, not a specific product: a 12-volt system with a 100-foot run and 60 watts of lights bunched at the far end. Current is 60 W / 12 V = 5 amps. The current travels out and back, so the conductor length is 200 feet.
- 14 AWG cable (about 2.53 ohms per 1,000 feet): 200 ft gives 0.506 ohm, so 5 A drops 2.53 volts, leaving about 9.5 volts at the end. Those lights look dim.
- 12 AWG cable (about 1.59 ohms per 1,000 feet): 200 ft gives 0.318 ohm, so 5 A drops 1.59 volts, leaving about 10.4 volts.
Fixtures spread along the run drop less than this worst case. Fix dimming with thicker cable, a shorter run, or splitting the lights into two runs. Check your manual for the minimum voltage your fixtures need.
Solar outdoor lights not working
Solar lights have no cable or transformer, so the causes are different. Work through these in order.
- Switch. Make sure the unit is ON, and pull any plastic battery tab.
- Panel. Wipe off dirt, pollen and film. Most need only a few hours of direct sun to charge, so shade from a tree, eave or fence is a common culprit. After several cloudy days, allow a day or two to recover.
- Battery. Rechargeable cells wear out after a few seasons. Swap in the same chemistry and voltage as the original, and check for corrosion on the contacts.
- Sensor. The panel usually doubles as the light sensor. Cover it in daytime; the light should come on. If it stays off, the sensor or circuit has failed. If a nearby lamp keeps it dark at night, move the light.
- Moisture. Condensation or water inside the housing corrodes contacts. Dry it out, and replace the unit if the board is corroded.
When outdoor lights not working means calling an electrician
Stop and call a licensed electrician when you see any of these:
- A GFCI or breaker that trips again after one reset (see Step 1). A GFCI that trips every few days, even after a new transformer, points to a wiring fault or another load on the circuit.
- Burn marks, melted plastic, buzzing, or a warm outlet or transformer.
- Water inside an outlet box or a weatherproof cover.
- A live outlet with the breaker on and no power at the lights, when the outlet reads zero volts.
- Any 120-volt fixture wiring, or hardwiring a transformer. Codes vary locally, and this work is not a DIY job.
Low-voltage fixes such as bulbs, connectors and cable splices are reasonable to do yourself once the transformer is unplugged.
Our Top Picks
Ready to shop? These are the top-rated options from our hands-on roundup, Best Solar Garden Lights of 2026.

Tenmiro Solar Pathway Lights 8-Pack, Warm White LED

DenicMic Solar Pathway Lights 10-Pack Cool White
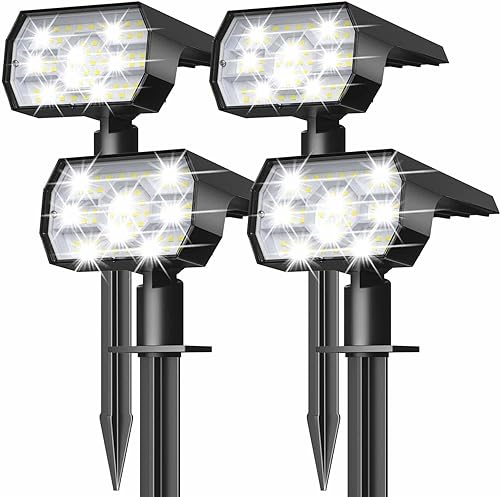
NYMPHY Solar Spotlights - 4 Pack, 56 LED, Cool White
As an Amazon Associate we earn from qualifying purchases. Product prices and availability are accurate as of the date/time indicated.
Related reading: addlon 100FT G40 Outdoor String Lights with Remote Review 2026 · Brightever Outdoor String Lights Review 2026
Frequently Asked Questions
Can I use a regular multimeter on a low-voltage landscape system?
Yes. Set it to AC volts, or DC if the transformer label says DC output, and touch the probes to the terminals or the fixture connector. Never probe an outlet or box that is wet, and leave 120-volt wiring to an electrician.
Will a bigger transformer fix dim lights at the end of a run?
Not by itself. A bigger transformer handles more total wattage, but voltage drop comes from the cable. Shorten the run, use thicker cable, or split the lights into two runs. Check the transformer manual for voltage taps.
Can squirrels or rodents make only some of my lights fail?
Yes. A chewed cable breaks the circuit from that point on, so every fixture past the damage goes dark. Unplug the transformer, find the nicked insulation, and repair it with a waterproof, direct-burial-rated splice.
Can I mix LED and halogen fixtures on one transformer?
Often that works if the total wattage stays within the transformer’s rating, but follow the manual. Some LED fixtures flicker on transformers they are not matched to, so check compatibility on the label.
{“@context”: “https://schema.org”, “@type”: “FAQPage”, “mainEntity”: [{“@type”: “Question”, “name”: “Can I use a regular multimeter on a low-voltage landscape system?”, “acceptedAnswer”: {“@type”: “Answer”, “text”: “Yes. Set it to AC volts, or DC if the transformer label says DC output, and touch the probes to the terminals or the fixture connector. Never probe an outlet or box that is wet, and leave 120-volt wiring to an electrician.”}}, {“@type”: “Question”, “name”: “Will a bigger transformer fix dim lights at the end of a run?”, “acceptedAnswer”: {“@type”: “Answer”, “text”: “Not by itself. A bigger transformer handles more total wattage, but voltage drop comes from the cable. Shorten the run, use thicker cable, or split the lights into two runs. Check the transformer manual for voltage taps.”}}, {“@type”: “Question”, “name”: “Can squirrels or rodents make only some of my lights fail?”, “acceptedAnswer”: {“@type”: “Answer”, “text”: “Yes. A chewed cable breaks the circuit from that point on, so every fixture past the damage goes dark. Unplug the transformer, find the nicked insulation, and repair it with a waterproof, direct-burial-rated splice.”}}, {“@type”: “Question”, “name”: “Can I mix LED and halogen fixtures on one transformer?”, “acceptedAnswer”: {“@type”: “Answer”, “text”: “Often that works if the total wattage stays within the transformer’s rating, but follow the manual. Some LED fixtures flicker on transformers they are not matched to, so check compatibility on the label.”}}]}